3 - Player Character Movement
Since Netick is a server-authoritative networking solution, we can't directly move the player character object (in a client-auth fashion) on the client for security reasons. Instead, we use inputs, which will be used to move our player. To move the player based on our input, here's how it works: we send an input to the server, the server fetches our input, and then uses it to move our character. Netick uses something called Client-Side Prediction to make this process responsive.
Learn More About Client-Side Prediction
Input Struct
Consider the type of player inputs required for our gameplay. In this tutorial, we only use a vector for movement direction.
- Create a C# script and call it
PlayerCharacterInput. - Change the type into
structfromclass. - Make sure to implement
INetworkInput.
This input will be sent to the server, and can be processed later on.
using Netick;

public struct PlayerCharacterInput : INetworkInput
{
    public Vector2 Movement;
}
Setting and Sending Input
There are a few places to set your input. The preferred way is on OnInput on NetworkEventsListener.
- Modify the
GameplayManagerscript. - Override the
OnInputmethod. - Use
sandbox.SetInputto set your input.
using Netick;
using Netick.Unity;
using UnityEngine;

public class GameplayManager : NetworkEventsListener
{
    // ...
    public override void OnInput(NetworkSandbox sandbox)
    {
        PlayerCharacterInput input = sandbox.GetInput<PlayerCharacterInput>();
        input.Movement             = new Vector2(Input.GetAxis("Horizontal"), Input.GetAxis("Vertical"));
        sandbox.SetInput(input);
    }
}
Fetch Input
We use a method called FetchInput to try to fetch an input for the current tick. If we are able to fetch an input, we use it to drive the gameplay logic, such as the movement of our character.
FetchInput must only be called inside NetworkFixedUpdate. To be able to use this method, let's create a new C# script named PlayerCharacterMovement, to handle our movement logic. Let's also change its parent class from MonoBehaviour to NetworkBehaviour.
We also need a moveSpeed variable, declare it using float type and set the default value to 5.
Learn More About Network Behaviour
public class PlayerCharacterMovement : NetworkBehaviour
{
    public float moveSpeed = 5;

    public override void NetworkFixedUpdate()
    {
        if (FetchInput(out PlayerCharacterInput input))
        {
            Vector3 movement = new Vector3(input.Movement.x, 0, input.Movement.y);
            transform.position += movement * Sandbox.FixedDeltaTime * moveSpeed;
        }
    }
}
In a single-player game, we use Time.deltaTime to move our player to make it frame independent. With Netick, instead of using Time.deltaTime, we use Sandbox.FixedDeltaTime, which represents the time between two network ticks.
Note
Do not confuse Sandbox.FixedDeltaTime with Sandbox.DeltaTime (equal to Unity's Time.deltaTime).
Learn More About Writing Client-Side Prediction Code
Network Transform
Adding NetworkTransform allows us to sync the position, rotation of our character.
- Add
NetworkTransformcomponent to our player character prefab.
Learn More About NetworkTransform
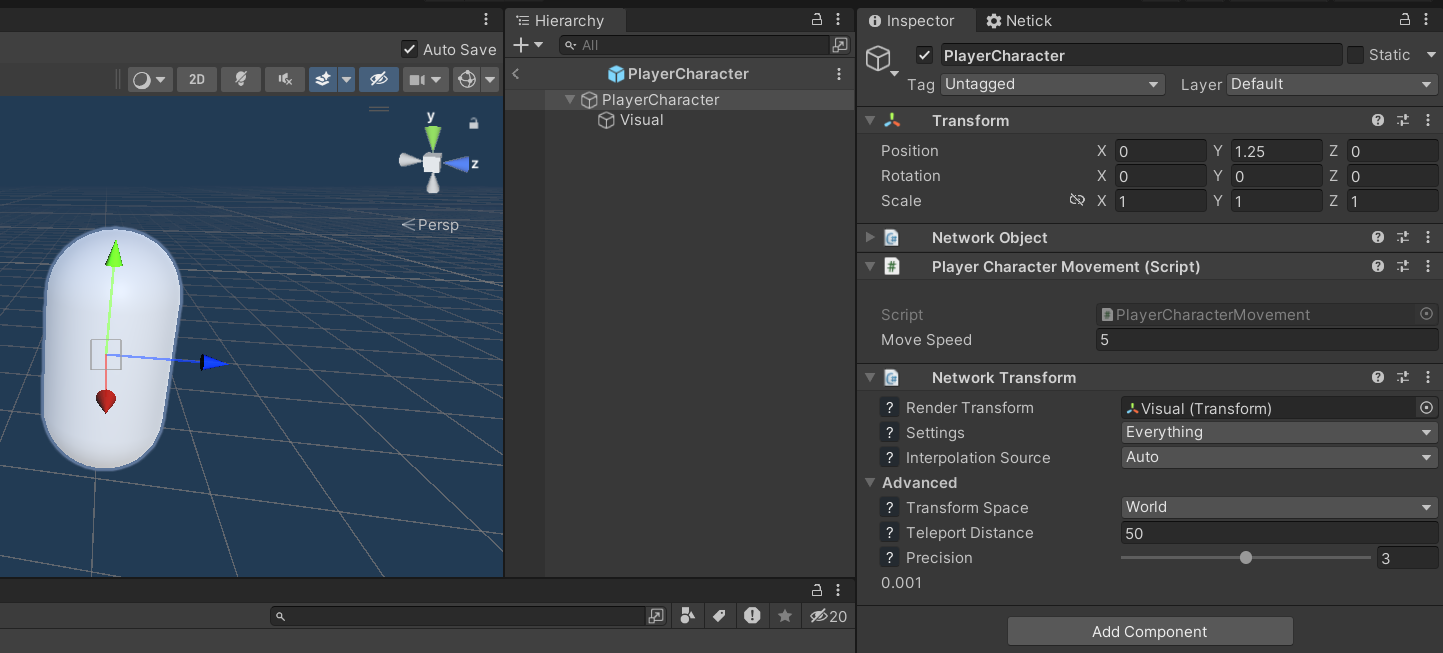
Gameplay & Visual Seperation
In the NetworkTransform component, there is a Render Transform field which asks for a Transform.
Because Netick is a tick-based netcode, it means movement will happen at a fixed rate which is lower than your FPS. Which will cause unsmooth movement. To fix this, we use interpolation which lets us give smoothed position and rotation to our player character visual.
- Create a child on the player and name it "Visual".
- Delete & Move the
Capsule (Mesh Filter)andMesh Renderercomponent to Visual. - Assign Visual to
Render TransformofNetworkTransform.
Learn More About Interpolation
Here's what our player character object looks like now:
Multiplayer Testing
Let's try to run the game now. In Netick, there is something called Sandboxing (or multi-peer), that allows us to simulate multiple peers on a single Unity process, meaning we don't have to build the game (or use two editors) to test multiplayer. Instead, we run a server and a client (or multiple) together in the same project at the same time.
- Enter play mode.
- Click on
Run Host + Client. - Click
Connect.
You can show/hide sandboxes in Netick > Sandboxes.